If you’re in need of a rope ladder for the sake of having all sorts of outdoor adventures (perhaps in defiance of the alleged tendency of Millennials avoiding outdoor contact in favor of surfing the Internet at home or taking selfies with themselves or their friends through their mobile phone), then you’re in luck.
You can make one yourself. Sure, you can also buy rope ladders, but they’re harder to come by compared to step ladders. What’s more, when you do get a ladder, it’s usually a lot shorter than you want and they don’t exactly come cheap (nor do you want to buy a cheap ladder since you want to be as safe as possible).
Necessary Tools and Materials
Whether you want a rope ladder for a treehouse, boat, jungle gym, or hayloft as well as for the sake of accessing the roof of your house without having to carry a step ladder every time (rope ladders are much more storable, transportable, and collapsible), you can make one yourself with a few basic materials listed below.
- Pencil
- Washers
- Masking tape
- Wood dowels
- Safety glasses
- Hammer and nail
- Chop saw or table saw
- Paracord that’s at least 1 inch thick
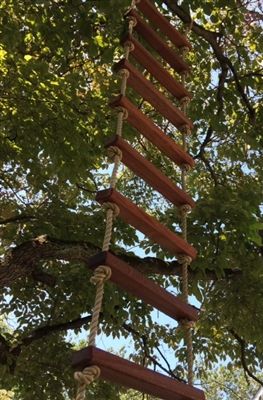
Image source: thechildinjuryfirm.com
How to Make a Rope Ladder
Step 1: Preparing the Materials
You should first prepare the materials outlined above. There’s no formula to know how much rope you’ll need. Take the desired height, multiply it by two, and then add 10 to 20 meters. You can buy about 26 meters of paracord in order to get a 6-7 feet ladder with some rope left over.
In terms of rungs, you’ll require a rung every 8-12 inches. In terms of width, it depends on the application. 12 inches is a good “rule of thumb” mark for your width. You should watch out from going too wide if your wood is unable to support it.
Step 2: Cutting the Rungs
In regards to cutting the rungs, you should always wear safety glasses as you go about it to avoid sawdust from getting into your eyes. You should also cut the dowels by marking them with pencil then making a cut on the mark.
It takes about six rungs to fill a six-foot ladder, with one rung per foot. If you want to add rungs, it’s preferable to do so with additional paracord since climbing rungs that are less than a foot apart is awkward.
 Step 3: Preparing the Paracord for Knotting
Get your rope or paracord. Make it into a narrow U-shape. Afterward, take a piece of masking tape then mark the bottom of the U or the center. You’ll be doing a constrictor knot. Try practicing a couple of times on how to do the knot.
A constrictor knot is the best knot to use for your rope ladder because it’s tight and economic. Also, like a Chinese finger trap, it’s a strong knot when pulled tight, which is the best knot to have when supporting the weight of a person climbing a ladder. Make sure to braid the ladder to make it stronger as well.
Image source: www.treehousesupplies.com
Step 4: Tying the Rungs
You also have the option to use a double constrictor knot to really ensure the tightness and integrity of your rope, but this comes at the cost of using more rope, so you’ll have to purchase more than 12 feet of rope just to make a six-foot high rope ladder.
Utilize the constrictor knot for the sake of tying the paracord around the cut pieces of dowel. Attempt to get the spacing on either side of the dowel roughly the same length so that you can adjust it later down the line (you should have enough slack to worth with).
Step 5: Tape and Knots
Your tape should come in handy when it comes to keeping the rope together before every knot is tied. Just remove the tape when you’re done. Try to get the two sides going on the first rung at the same length for the sake of keeping your ladder as balanced as possible.
After you’re through, make sure the knots are properly aligned and tightened for that they don’t slide off. When you step on the ladder for the first time, expect them to slide at first. Thusly, adjust the knots for the sake of removing any imbalances.
Step 6: Continuing Down the Ladder
Repeat the above mentioned steps for every 12 inches or a foot of length needed. Do this until you’re done. Make sure the spacing is equal and adjust the balance and spacing whenever you’re finishing up on a rung. Ensure that they’re all even so your ladder won’t skew or tilt.
As for mounting the ladder, you can do so on, for example, the inside of your window for the sake of having a rope ladder fire escape in case you lack a metal ladder on hand. You can also pound a three-inch nail to a solid beam on your barn to test its toughness.
Step 7: Mounting Options and Safety
While there’s certainly more than one way to go about ladder mounting, certain options are better than others. It’s also preferable to err on the side of caution. For instance, while a nail might be enough to make a rope stick to a surface, you need better reinforcement to make it stay there.
You can, for example, make your nail tilt so it would hold on stronger or have the ladder edges tied to something nice and strong so that it could support the weight of most adults. When testing your rope ladder’s mounting durability, make sure there’s an adjacent ladder available in case the paracord breaks.
Conclusion
After you’ve installed your ladder, then you’re in for a treat. There are an infinite amount of uses for a rope ladder plus it’s a lot less cumbersome to wield, take out, or store compared to a traditional step ladder. You can use it for emergencies, rescues, a tree house, or even for climbing down steep places.
A properly constructed rope ladder should be dependable and sturdy enough to suit your needs and it’s easier to climb compared to just having a rope hanging off of a ledge or something. This particular ladder is made of paracord and wooden dowel rungs that should support a child to a grown adult.
Incoming search terms:
- how to make a rope ladder with paracord